How to upload non-android 360 panoramas to Google Maps
 by Milo Timbol | August 9, 2013
In Google Maps or Google Views (I'm not sure if this is how you call it) you can now upload photospheres taken using your android phone. This is great if you're uploading shots taken from your phone but what about 360 panoramas taken using your DSLR? Good thing there's a way to do it and in this post I am gonna show you how.
I am not going to write a tutorial on how to shoot 360 panoramas (click here if you want to learn how to shoot 360 panoramas), I assume you already know how to do that and you have some equirectangular images you want to upload to google maps / views or whatever it's called.
There are two ways to do it (that I know of) the easy but longer way and the quick but more complicated method. I am going to show you both
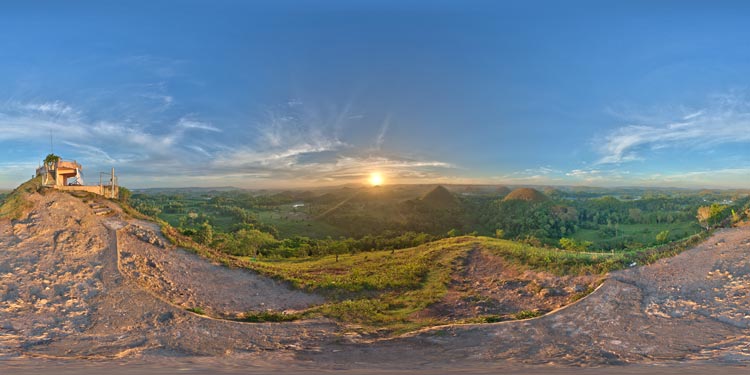
In this tutorial I converted this panorama to be fit for google maps upload. Below is a resized equirectangular image of that panorama. This is not the actual file I used, I just want to show you how it looks like as a flat image. The actual dimension of the real file is 6000 x 3000 pixels.
To make a 360 panorama fit for upload to google we need to add some metadata to the photo. There are probably a lot of ways to do this but these 2 are the ones I know of.
Step 1 : Add metadata to the equirectangular image
Method 1 : The easy but slower way
Go to this website - www.photo-sphere.appspot.com/ and upload your equirectangular file. Basically what we are going to do here is upload the 360 panorama, add some metadata to it like geolocation (latitude, longitude) plus photosphere specific stuff and then download it back. The only problem here is if you're uploading a big file it will take a while to upload and download but like I said this is the easiest way I know of. The file I used is 6000 x 3000 pixels and I converted it from TIFF to jpeg to make it smaller, the file size is around 6mb so it didn't take a lot of time to do.

Once the upload is finished you'll see this screen. I leave the first 3 input fields to default, you can change the compass heading but it's hard to know what value to put without some graphical help, I wish they'd do something similar to how 360cities.net does it. The only thing I change here is the location, I just search for the place where the photo was taken and it would autocomplete and I'd just select the right one.
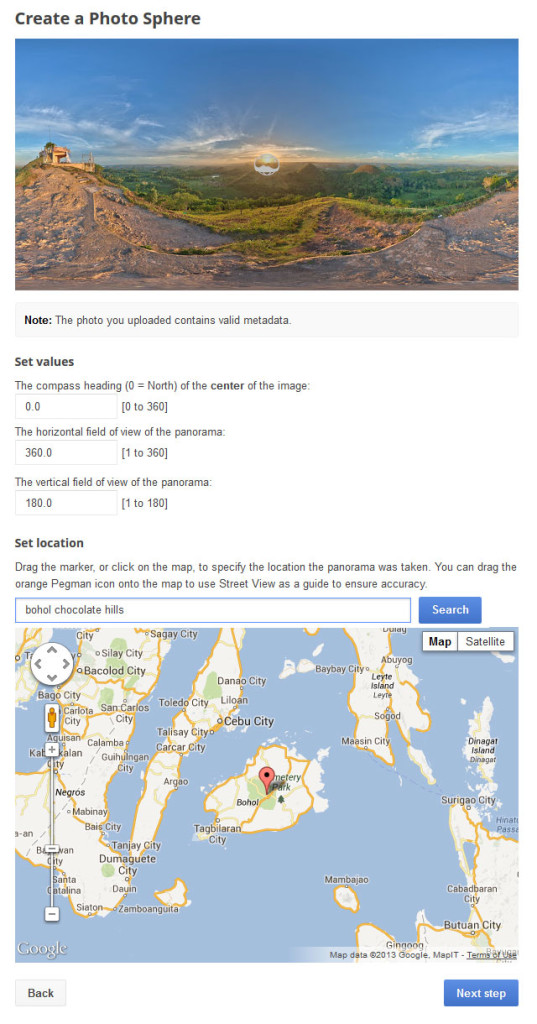
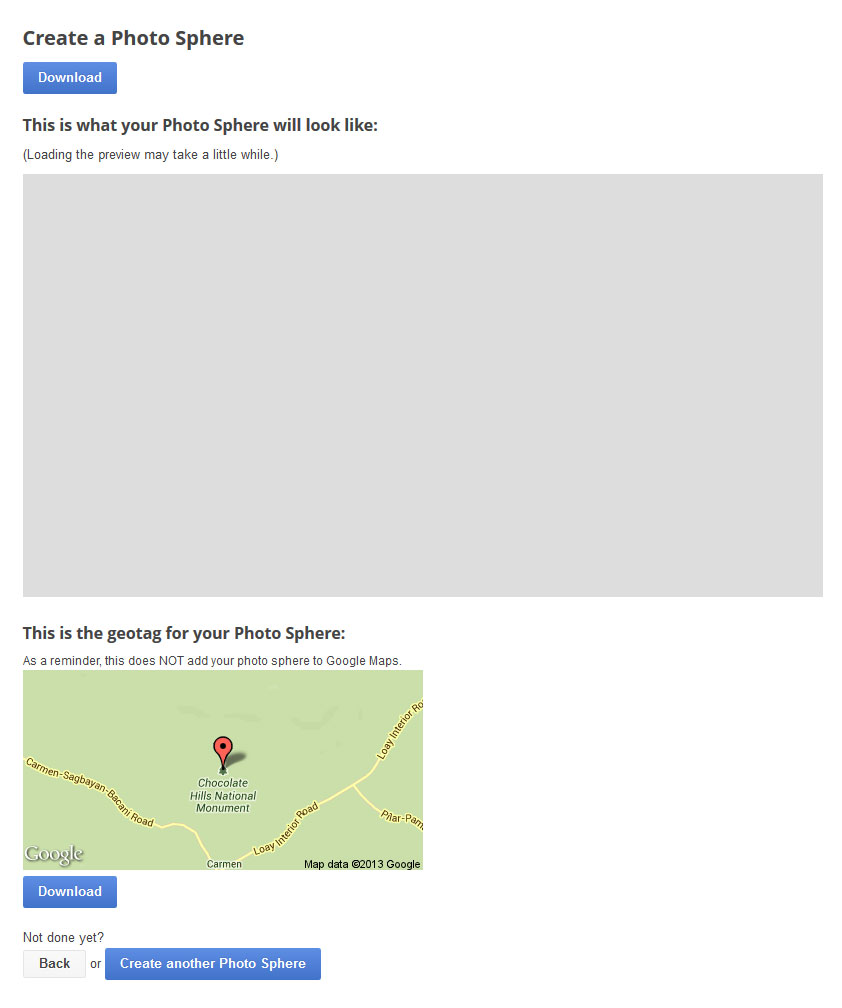
After you're done setting the location click Next Step. You are supposed to see a preview of the 360 panorama but it never seems to load. Click Download. This file is the same file you uploaded except it has metadata added to it. You can now upload this to Google Maps. Before we do that I'll show you another way to add the metadata.
Method 2 : The faster but more complicated way
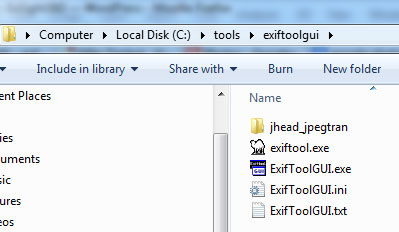
In this method we will add the metadata manually. To do that we will use a tool called Exif Tool. Visit the website and click on the download link which says Windows Executable: exiftool-9.34.zip (3.5 MB), I am using windows but the Mac way should be similar. Save and Unzip the file somewhere.
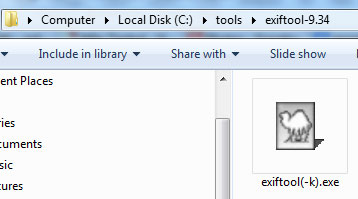
Go to this website www.freeweb.siol.net/hrastni3/foto/exif/exiftoolgui.htm and look for the ExifToolGUI download link. Download and then unzip. Rename exiftool(-k).exe (the file you downloaded earlier) to exiftool.exe and copy it to where the ExifToolGUI.exe is located.
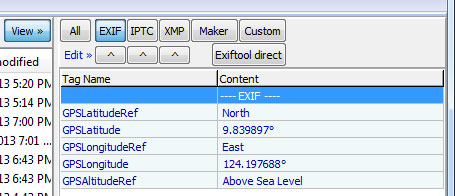
Run ExifToolGUI.exe. On the left panel browse to where you equirectangular is located. On the center panel click on the file you want to add metadata to. On the right panel you'll see the metadata of this image.
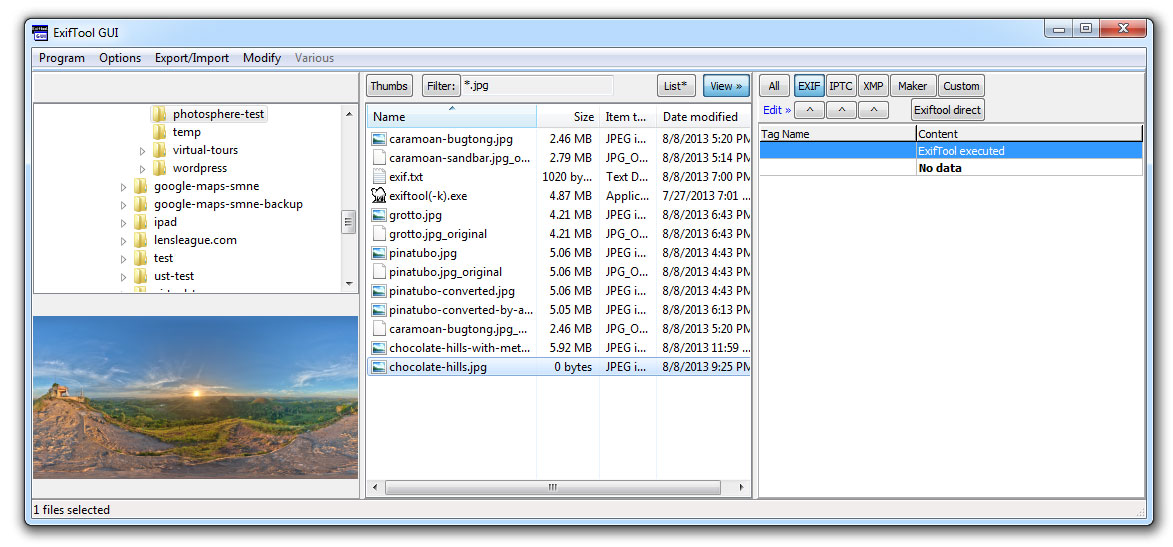
Select the EXIF tab and click on the button under it that looks like an up arrow. A new pop up window will open with a few tabs in it, select the one at the end which says various. You should now see some geolocation fields. You can change the format of the coordinate by going to the main window and clicking on Options > Show Exif:GPS in decimal degrees
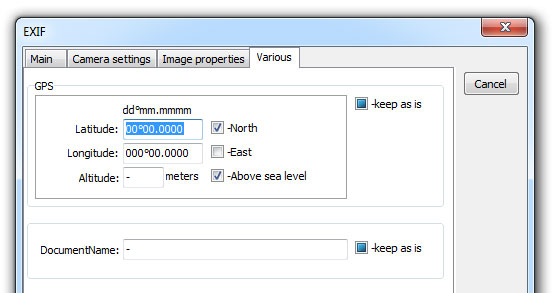
There are a lot of ways to get the coordinates of your image one way to do it is go to www.latlong.net/ and find the location there.
Copy the latitude and longitude to the ExifToolGUI and then click save. Your image should now have some geolocation metadata.
Aside from the geolocation metadata we need to manually add some photosphere specific metadata. Below are the metadata I added, some are optional and I'm not sure how important these are. The only thing you need to change here are the values for CroppedAreaImageWidthPixels, CroppedAreaImageHeightPixels and FullPanoWidthPixels, FullPanoHeightPixels set this to match the dimensions of your 360 panorama, everything else you can leave the same.
- ProjectionType=equirectangular
- UsePanoramaViewer=True
- CroppedAreaImageWidthPixels=6000
- CroppedAreaImageHeightPixels=3000
- FullPanoWidthPixels=6000
- FullPanoHeightPixels=3000
- CroppedAreaLeftPixels=0
- CroppedAreaTopPixels=0
- PoseHeadingDegrees=0.0
- InitialViewHeadingDegrees=0
- InitialViewPitchDegrees=0
- InitialViewRollDegrees=0
- InitialHorizontalFOVDegrees=90.0
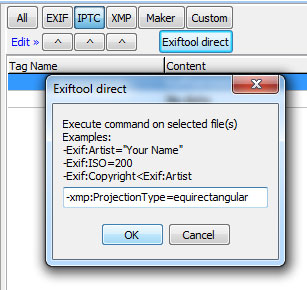
To do that on the ExifToolGUI click on the Exiftool Direct tab and enter these lines one at a time.
- -xmp:ProjectionType=equirectangular
- -xmp:UsePanoramaViewer=True
- -xmp:CroppedAreaImageWidthPixels=6000
- -xmp:CroppedAreaImageHeightPixels=3000
- -xmp:FullPanoWidthPixels=6000
- -xmp:FullPanoHeightPixels=3000
- -xmp:CroppedAreaLeftPixels=0
- -xmp:CroppedAreaTopPixels=0
- -xmp:PoseHeadingDegrees=0.0
- -xmp:InitialViewHeadingDegrees=0
- -xmp:InitialViewPitchDegrees=0
- -xmp:InitialViewRollDegrees=0
- -xmp:InitialHorizontalFOVDegrees=90.0
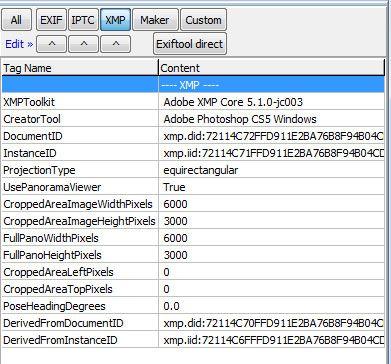
When you finish your XMP meta data should look like this. Some of the values here are auto generated like the XMPToolkit and the ID ones. That's it your image should be ready for upload to Google Maps.
Step 2 : Upload the 360 panorama to your Google Plus account.
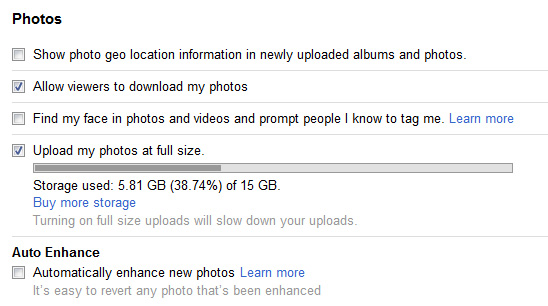
Login to your google plus account and create an album. Before you upload your pictures let's enable full size uploads. If you don't do this google will resize your photos, read about it here. Special thanks to David Schmidt for this tip
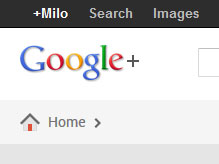
In Google plus on the top left portion of the screen hover your mouse over the home button.
A sidebar menu will slide out click Settings.
Scroll down to the photos section and check Upload my photos at full size. You can now start uploading your photospheres to the album you created. David also mentioned Auto Enhance was causing problems with his panoramas so you might want to untick that one.
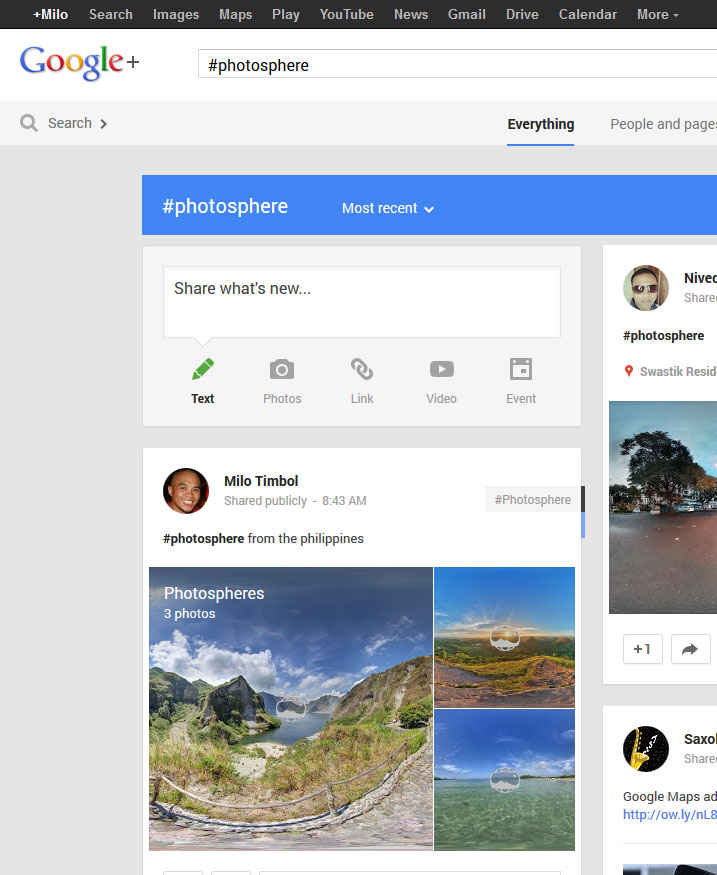
Once your photospheres have finished uploading your screen should look something like this.
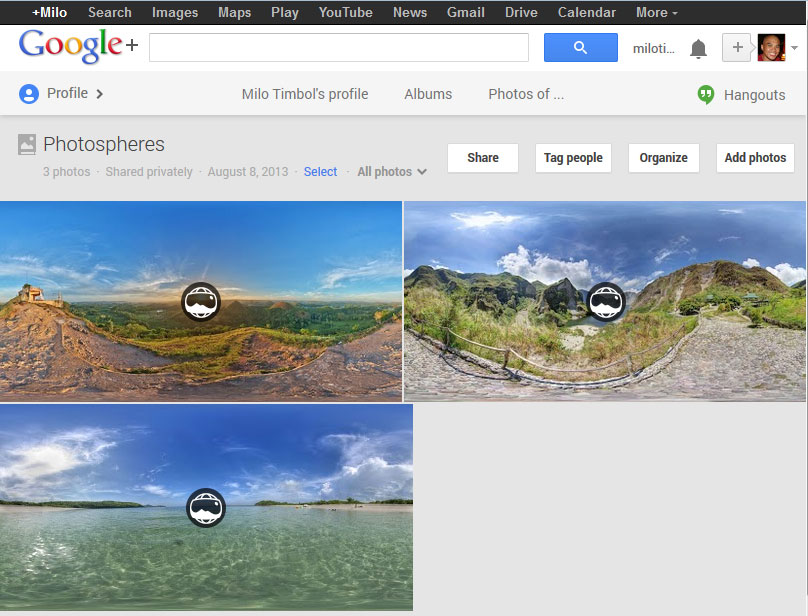
If you were able to successfully add the metadata you should see the photosphere icon in the center of the image. If you click on the image a window will pop out and allow you to view the interactive 360 panoramic photo. If you just want to be able to view your 360 panoramas on google plus and not upload it to google maps, you can skip adding the geolocation when adding the metadata.
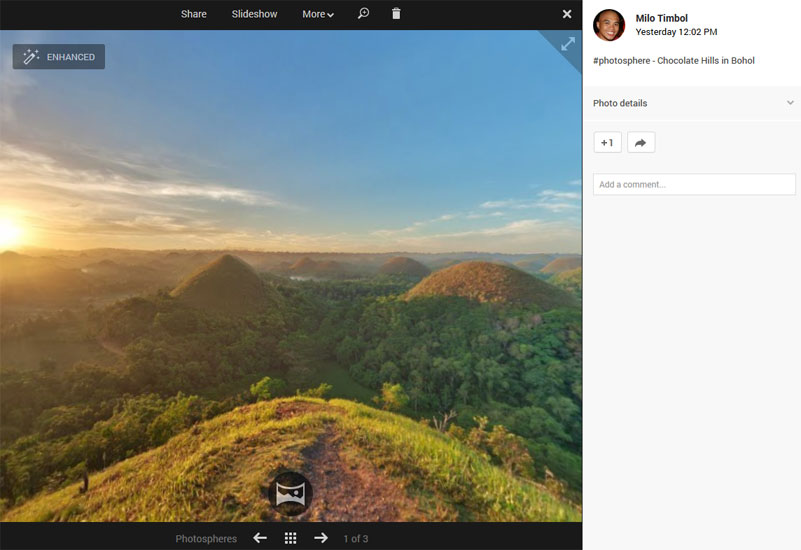
When sharing your photos you can add the hashtag #photosphere. If you're album is shared publicly you should see your post when you search #photosphere.
Step 3 : Upload to Google Maps
Go to the Google Views website. You should still be logged in on your google plus account, if not log in first.
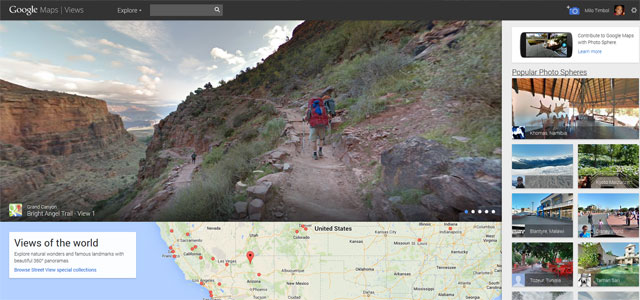
On the top right section of the screen click on the camera icon with a plus button. What you are going to do is submit the images you uploaded to google plus to google maps.

When the window opens navigate to the album where you uploaded your 360 photos and select the one you want to submit. Click Select and on the next page Publish. You should get a message saying "Your Photo sphere is being added to your Views profile. It will be publicly viewable on Google Maps if approved".
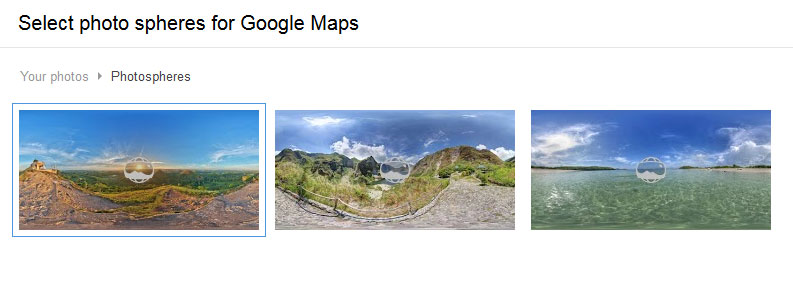
On the window where you can select the photospheres, if some images are disabled or blurred out but you can view the interactive version on google plus this is probably because you didn't add the geolocation metadata.
In a few hours you'll get an email from google saying your photo sphere has been approved. If you go to google maps you should now see your 360 panorama there.

Here's the final link
www.google.com/maps/views/view/105257672314708792776/5d424d6cfa64f732?gl=us.
Unfortunately I didn't turn on full size uploads when I uploaded the photosphere above (because I didn't know about it yet) so google resized it. When I turned it on and re-uploaded the image, the picture quality was much better. Click here to see the same 360 panorama with better quality.