How to install photosphere on a Samsung Galaxy S3
 by Milo Timbol | May 7, 2013
Android Jelly Bean 4.2 has this cool feature which allows you to create 360 panoramic photos, it is called photosphere. However Jelly Bean 4.2 might still be months away from being officially released to the Samsung Galaxy S3 so I had to do some "hacks" to install this feature. I am no expert on android and I usually don't want to modify my phone as I might break it and loose important data but for this case I needed to test the photosphere for a project I am working on
To install it I basically followed the instructions I found on this website
How to Install Google's New Jelly Bean 4.2 "Photo Sphere" Camera on Your Samsung Galaxy S3
It's pretty straightforward except the part where he says
"Once in Recovery, wipe Cache and Dalvik Cache. Flash the file you placed on your phone. Before rebooting, find the "Fix Permissions" option and select it. Now, reboot."
For some reason I could not find that Dalvik cache option. It turns out I needed to install clock work mod first. So I used instructions here to do that. Another thing I also had to do was put a micro SD card to my S3 because in clock work mod you have to get the file from the SD card. There is a menu item saying "install zip from SD card". I am referring to this file by the way. The link is also found on the first website I mentioned.
If you've followed the instructions correctly you should see two new icons on your phone.
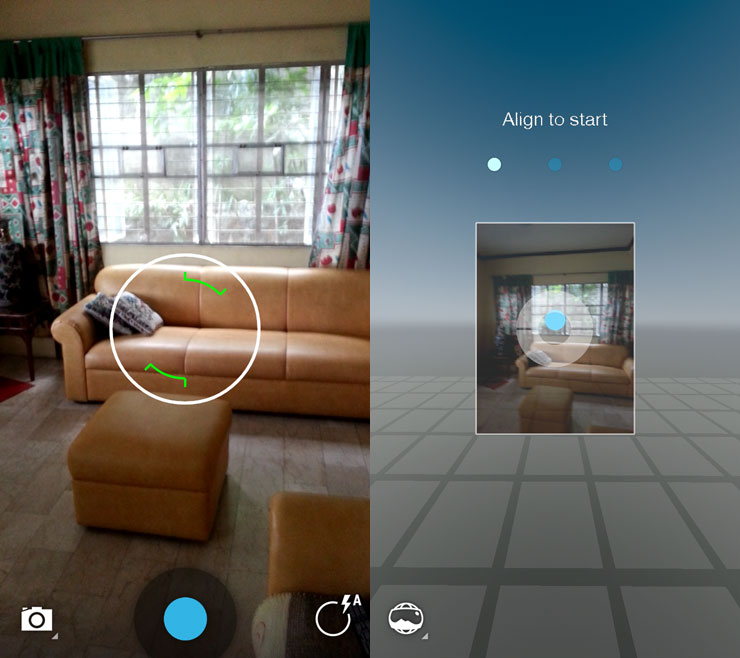
To begin using photosphere just launch the new camera app. You should see the viewfinder as shown in the photo below. Click on camera icon on the lower left section of the screen and then select the sphere icon. Slowly complete the sphere by aligning the camera to where the blue spots are. Once you've completed the sphere press the stop button. Photosphere will stitch the photos automatically. Go to the new Gallery app and click on the thumbnail of the 360 photos you've just taken to see the resulting 360 sphere, if it's not yet done stitching you will see a status of the stitching process.
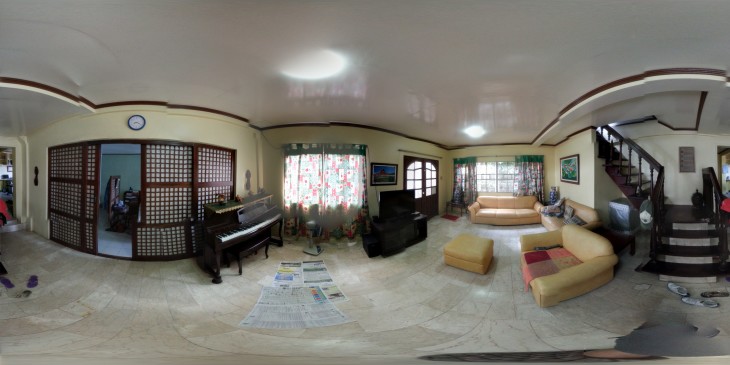
Here's a sample result taken handheld in portrait position. Click here to download the full sized file. To see the interactive 360 tour click on the image below.
With any 360 panoramic photo the secret to getting a perfect stitch is to keep the camera at it's nodal point or NPP when shooting. According to wiki.panotools.org NPP is - This special "no-parallax point" is the center of the lens's entrance pupil. It is very difficult to this handheld that is why professional panoramic photographers always use a tripod or monopod with a panoramic head.
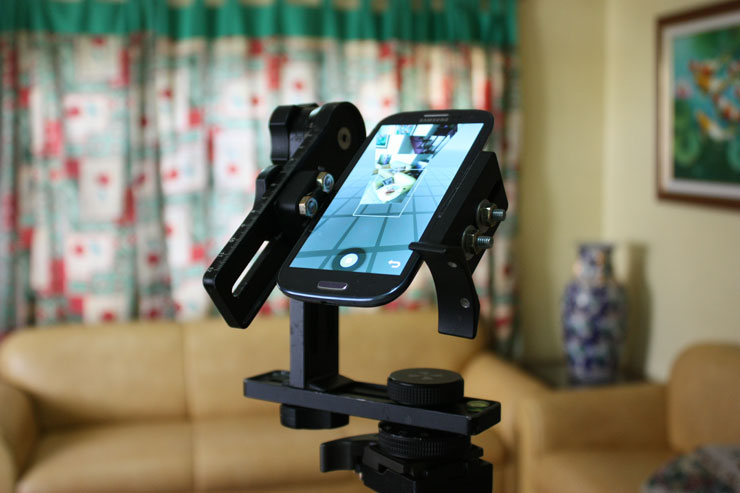
Although you can create a nice 360 panoramic photo handheld I wanted to see if I could get a perfect stitch if I used a nodal head for my Galaxy S3 so I dismantled my pano pro lens and combined it with my Nodal Ninja 3 to come up with my own panoramic head for Samsung Galaxy S3.
Here's the result taken with the custom nodal head. Click here to download the full sized file. To see the interactive 360 tour click on the image below.
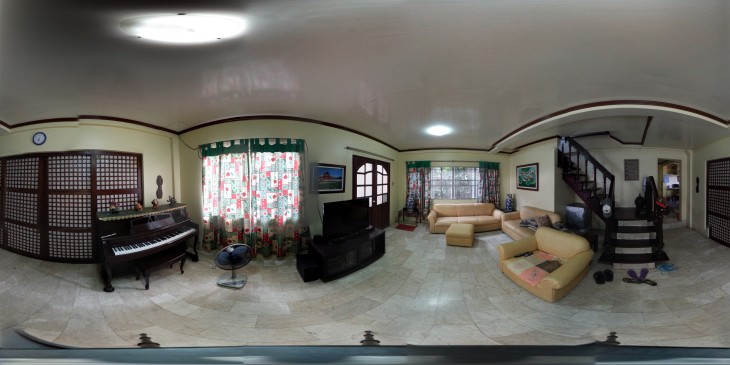
The panoramic photo taken using the tripod looks better and has fewer stitching errors however I expected there weren't going to be any errors and it would be perfect stitch. It could be because the stitching of photosphere is not as advanced as other stitching software like ptgui or maybe I still didn't get the correct Nodal point of the Samsung Galaxy S3. Anyway, perfect stitch or not the results are promising and the technology will definitely improve in the years to come. I am excited to see the future releases of photosphere.